Stripe Payments plugin Demo
Stripe Checkout plugin lets you accept credit card payments via Stripe on your WordPress site. Whether you are selling products, offering services, or collecting donations, our lightweight Stripe payment plugin is built for speed, security, and simplicity.
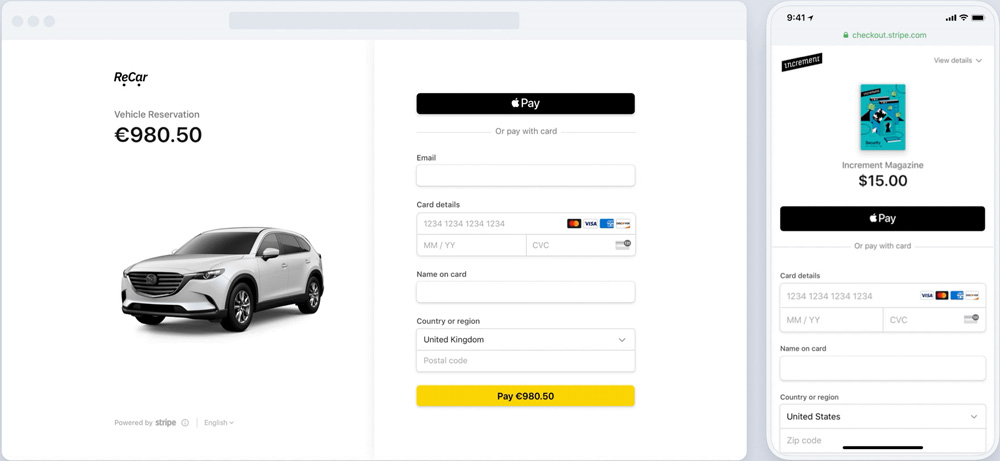
Accept Stripe payments on your WordPress website in minutes
WP Stripe Checkout is great for:
- Freelancers accepting client payments
- Nonprofits collecting donations
- Selling goods or services
- Subscription-based offerings
WP Stripe Checkout Add-ons
- Variable Price
- Variable Quantity
- Submit Type
- Terms of Service
- Payment Link Email
- Variable Currency
- WP User Tracking
- WP User Only Button
Stripe Checkout Payment Methods
- Apple Pay
- Google Pay
- Alipay
- WeChat Pay
- Bancontact
- EPS
- giropay
- iDEAL
- Przelewy24
- Sofort
- Afterpay/Clearpay
- Boleto
- OXXO
- ACH Direct Debit
- Bacs Direct Debit
- BECS Debit
- Canadian pre-authorised debit (PAD)
- SEPA Direct Debit
Features
- Accept credit/debit card payments with Stripe
- Easy setup with Stripe API keys
- Secure, PCI-compliant payment processing
- Customizable payment button via shortcode
- Supports one-time and recurring payments via Stripe payment links
- Mobile-friendly Stripe Checkout integration
- Detailed transaction logs in your dashboard
- Support Dynamic 3D Secure payment authentication.
- Support payment processing with Stripe test cards.
- Support phone number collection at checkout.
- Support user redeemable promotion codes at checkout.
- Localized for different languages.
- Automatically email Stripe receipts to your customers.
- No complex setup like a membership/e-commerce plugin.
- Easily Switch between live and sandbox mode for testing.
- Send a purchase confirmation email to your customer after a transaction.
- Send a sale notification email to a chosen recipient (e.g. the seller) after a transaction.
- Automatic VAT/tax ID collection at checkout
- Support orders of free trial payments without payment methods
WP Stripe Checkout Configuration
Once you have activated the plugin, you need to add your Stripe account API keys. It’s located under “WP Stripe Checkout -> Settings -> General”.
WP Stripe Checkout Emails
Stripe checkout plugin comes with an “Emails” tab where you will be able to configure some email related settings.
Stripe Webhook Endpoint
Go to “Developers > Webhooks > Add endpoint” and insert the URL shown in the plugin settings. Select this event – “checkout.session.completed” and click “Add endpoint”. This is where Stripe will send a notification after a checkout payment is successful.
You will also need to add the “checkout.session.async_payment_succeeded” and “checkout.session.async_payment_failed” events if you plan to use a payment method where there can be a delay in payment confirmation. For example:
- Bacs Direct Debit
- Boleto
- Canadian pre-authorised debits
- OXXO
- SEPA Direct Debit
- SOFORT
- ACH Direct Debit
How to use Stripe Checkout
The easiest way to start accepting Stripe payments is to add the following shortcode to a post/page:
[wp_stripe_checkout_session name="My Product" price="2.99"]
Replace the value of “name” with your product name and “price” with the actual product price.
How to use Stripe Payment Links
This method allows you to integrate Stripe payment links with the plugin.
Step 1: Create a Payment Link
Log in to your Stripe account dashboard and navigate to the “Payment links” page (Payments > Payment links). Select an existing product or add a new one to create a payment link.
Step 2: Use the Payment Link in a Shortcode
In order to create a button with the payment link you can add the following shortcode to a post/page:
[wp_stripe_checkout_payment_link url="https://buy.stripe.com/live_6gPE4jw7dMbUKdd3345"]
For detailed setup instructions please visit the WP Stripe Checkout plugin page.