FormsCRM – Connect Forms to CRM directly
by closemarketing on WordPress.org
Connects your CRM, ERP and Email Marketing with your Forms plugin and create new Leads/Entries as the forms are filled automatically. GDPR compliant.
Connects your CRM with the main Form Plugin directly, and send to your CRM when the form is filled automatically.
With this plugin, you don’t have to use third party software to send your Leads/data to your CRM. You will have a direct connection between your website and your CRM. It’s a connector between Web <> CRM/ERP/Email.
This plugin will connect different Forms plugins to CRM. We support at this time these forms plugins:
– GravityForms
– Elementor Forms
– Contact Form 7
– WooCommerce
– WPForms PRO
If you need to support more Forms plugins, please contact in forum support.
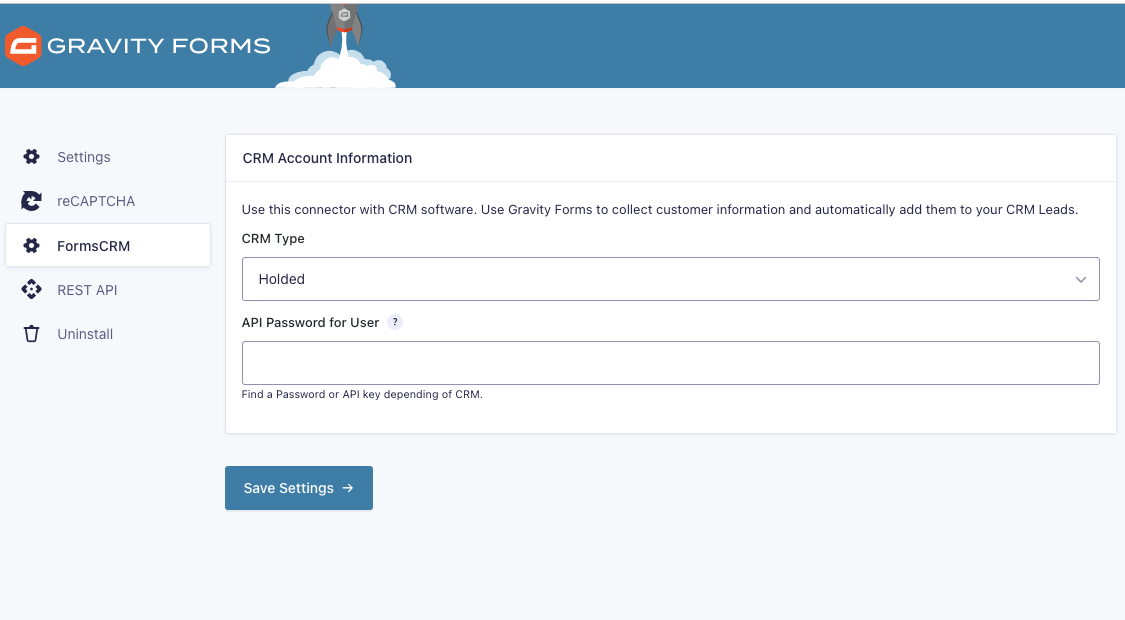
The plugin setup is very easy. Once you have uploaded the plugin, you configure the plugin with the URL, user and password of the user that will create the entries in the CRM.
After that, you’ll go to each form feed that you want to connect with the CRM. You will see a mapping fields where you choose for every field, the equivalent for CRM software field.
The plugin connects with the CRM via API webservice, a secure and best way to connect it. It doesn’t use a third party software. You’ll comply GDPR becaouse of not having a third provider.
At this time, FormsCRM supports in free version:
– Holded
– Clientify
– AcumbaMail
– MailerLite Classic
– Brevo
And you will find, that there are Premium Addons to support:
– Holded CRM
– Odoo
– vTiger 7
– PipeDrive
– Inmovilla
– SuiteCRM
– FacturaDirecta
– WHMCS
You can use multiple feed connector in GravityForms, WPForms PRO, Elementor Forms and ContactForm7, and you can use multiple CRM connectors in the same form.
Demo:
Dynamic values in GravityForms and WPForms
We have developed a way to get values from other fields in GravityForms and WPForms. You can use this in the field mapping in the feed. You can use:
{id:N} in order to get the value from field N
{label:N} in order to get the label from field N (only in GravityForms)
Expert Mode
You can enable Expert Mode in the form feed. This mode will show all fields of the CRM in the form mapping. This is useful if you want to connect all fields of the CRM to the form. Now currently works for Odoo.
We recommend to use this in the field mapping in the feed and hidden field that gets the value.
Slack Error Notifications
Receive instant error notifications in your Slack workspace! When a form submission fails to send to your CRM, you’ll get real-time alerts directly in your Slack channel.
How to Configure Slack Notifications:
- Create an Incoming Webhook in Slack (https://api.slack.com/messaging/webhooks)
- Go to Settings > FormsCRM in WordPress
- Paste your webhook URL in the “Slack Webhook URL” field
- Choose the Slack channel where you want to receive notifications
- Save changes
What Information is Included:
When an error occurs, the Slack notification includes:
– Site Information: Site name and URL in a single line
– Form Details: Form type (Gravity Forms, WPForms, Elementor, etc.), Form ID, Form name, and Entry ID
– Error Details: CRM name and complete error message
– Lead Data Preview: First 3 fields from the form submission (+ indicator if more fields exist)
– Technical Details: API endpoint URL for debugging
Message Format:
All Slack notifications use a compact, easy-to-read format with information presented in single lines. Messages are color-coded in red (danger) to stand out in your channel and ensure immediate attention to critical errors.
Error Notifications
Custom Email for Error Reports
You can configure a custom email address to receive error notifications when a form submission fails to send to your CRM. This is useful when you want different team members to receive error alerts without using the admin email.
To configure:
1. Go to Settings > FormsCRM
2. Enter one or multiple email addresses (comma-separated) in the “Error Notification Email” field
3. Save changes
Enhanced Error Email Information
When an error occurs, you’ll receive a detailed email notification that includes:
– Site Information: Site name, URL, and timestamp of the error
– Form Information: Form type (Gravity Forms, WPForms, Elementor, etc.), Form ID, Form name, and Entry ID
– Error Details: CRM name, complete error message, and all form data in a formatted table
– Technical Details: API URL and JSON request for debugging purposes
The email is professionally formatted with color-coded sections for easy reading and quick troubleshooting.
Error Log with Automatic Retry System
Track, Manage, and Automatically Retry Failed Form Submissions
The Error Log feature provides a comprehensive interface to view, track, and manage all errors that occur when sending form submissions to your CRM. This powerful tool includes an automatic retry system that helps you troubleshoot issues and recover from failed submissions without requiring manual intervention or users to resubmit forms.
Key Features:
- Automatic Retry System: Failed entries are automatically retried up to 3 times with 1-hour intervals between attempts
- Smart Retry Management: Retries stop automatically when an entry is successfully sent or manually deleted
- Complete Error Tracking: All errors are automatically saved to the database with complete context including CRM type, error message, form information, lead data, and technical details
- Advanced Filtering: Filter errors by status (failed/success) and CRM type to quickly find specific issues
- Detailed Error Information: View complete error details including lead data, API URLs, JSON requests, and full error messages
- One-Click Manual Resend: Manually resend failed entries directly from the error log with a single click
- Error Management: Delete individual entries or clear all logs with confirmation dialogs
- Pagination: Navigate through large numbers of error logs with built-in pagination (20 entries per page)
- Visual Status Tracking: Status badges show failed and successful entries at a glance
- Retry Progress Counter: Shows retry attempts (e.g., “2/3”) and displays time until next automatic retry
- Responsive Design: Fully responsive interface that works on all devices
Automatic Retry System:
When a form submission fails to send to your CRM:
- The error is logged immediately and the first retry is scheduled for 1 hour later
- If the retry fails, another retry is scheduled for 1 hour after that
- This continues for up to 3 total attempts (original submission + 2 retries)
- If an attempt succeeds, all future retries are automatically cancelled
- You can manually resend at any time, which counts toward the 3-attempt limit
- The interface shows the current attempt count (e.g., “1/3”, “2/3”) and time until next retry
How to Use:
- Go to WordPress Admin FormsCRM Error Log tab
- View all form submission errors in an organized table
- Filter by status or CRM type to find specific errors
- Click Details to view complete error information including retry schedule
- Click Resend to manually retry sending a failed entry to your CRM
- Click Delete to remove individual log entries and cancel any pending retries
- Use Clear All Logs to remove all entries at once and cancel all pending retries
What Information is Displayed:
- Date and time of error
- CRM type (Holded, Clientify, etc.)
- Form information (type, ID, name, entry ID)
- Complete error message
- All lead data from the form submission
- API endpoint URL
- JSON request payload
- Retry attempts count (e.g., “2/3”)
- Time until next automatic retry (e.g., “Next: in 45 minutes”)
- Last resend date and time
The Error Log with automatic retry system helps you maintain data integrity by ensuring no form submissions are lost due to temporary errors, connectivity issues, or API downtime. The automatic retry mechanism increases the success rate of form submissions without requiring manual intervention.
Markdown Export for GravityForms Entries
Export your GravityForms entries as portable, human-readable Markdown files
The Markdown Export feature allows you to export GravityForms entries into clean, well-structured .md files. This makes it easy to document, share, version control, or integrate form submissions with knowledge bases, static site generators, or any Markdown-compatible system.
Key Features:
- Single Entry Export: Export individual entries directly from the entry detail page
- Bulk Export: Export multiple selected entries at once as a convenient ZIP file
- Clean Formatting: Produces readable, well-structured Markdown with proper headers and field organization
- Comprehensive Field Support: Handles all GravityForms field types including text, email, number, textarea, checkboxes, multiselect, name fields, address fields, file uploads, and list fields
- Smart Content Handling: Properly formats multi-line content, preserves line breaks, and handles file attachments with Markdown links
- Metadata Included: Each export includes form title, entry ID, submission date, and all field labels and values
- Safe Character Escaping: Automatically escapes Markdown special characters to ensure valid output
How to Use:
Single Entry Export:
1. Go to Forms Entries in GravityForms
2. Click on any entry to view its details
3. Find the Export to Markdown widget in the right sidebar
4. Click Download Markdown to get the .md file
Bulk Export:
1. Go to Forms Entries in GravityForms
2. Select one or multiple entries using the checkboxes
3. Choose Export to Markdown from the bulk actions dropdown
4. Click Apply to download a ZIP file containing all selected entries as separate Markdown files
Exported Markdown Format:
Each Markdown file includes:
– Form title as the main heading
– Entry ID and submission timestamp
– All filled fields organized in a clean bullet list format
– Field labels in bold with their corresponding values
– Multi-line content properly formatted with preserved line breaks
– File attachments as clickable Markdown links
Use Cases:
- Document form submissions for record-keeping
- Share entry data with team members in a readable format
- Version control form submissions using Git or similar tools
- Import entries into knowledge bases or wikis
- Generate reports or documentation from form data
- Backup form entries in a portable, future-proof format
- Integrate with static site generators (Jekyll, Hugo, etc.)
Settings for Clientify
Instructions for adding Clientify cookie in the forms
Clientify cookie adds the ability to merge the contact with the Clientify cookie in the form. You will see if Clientify is added as CRM, a new hidden field in your form. You could check if is already in the form, but if you don’t have it you can add it and put as css clientify_cookie .
Add Pipeline name in Opportunities
You can add a new field that fits with the Pipeline name in Opportunities in Clientify. You will need to use the same name as the Pipeline in Clientify.
Add expected closure date for Deals in Clientify
You can add a new field that fits with expected closure date for Deals in Clientify. This field is optional, and you need to add a number of days to the expected closure date. The plugin will calculate the date from today and will add it to the Deal in Clientify.
Autoassignment in Clientify
Field that applies the autoassignment to the contact. You can add a string with the list of usernames (property emails) separated by comma (,) to apply the autoassignment.
Webhook in GravityForms
You can add a new field that fits with the Webhook in GravityForms. This field is optional, and you need to add the webhook url. The plugin will send the form data received from CRM to the webhook url.