EMC Scheduling Manager is the easiest way to integrate your Calendly scheduling pages into your WordPress website. Embed Calendly features into WordPress with ease, forget the back-and-forth between multiple tabs, now you can manage common Calendly tasks directly from WordPress with just a few clicks!
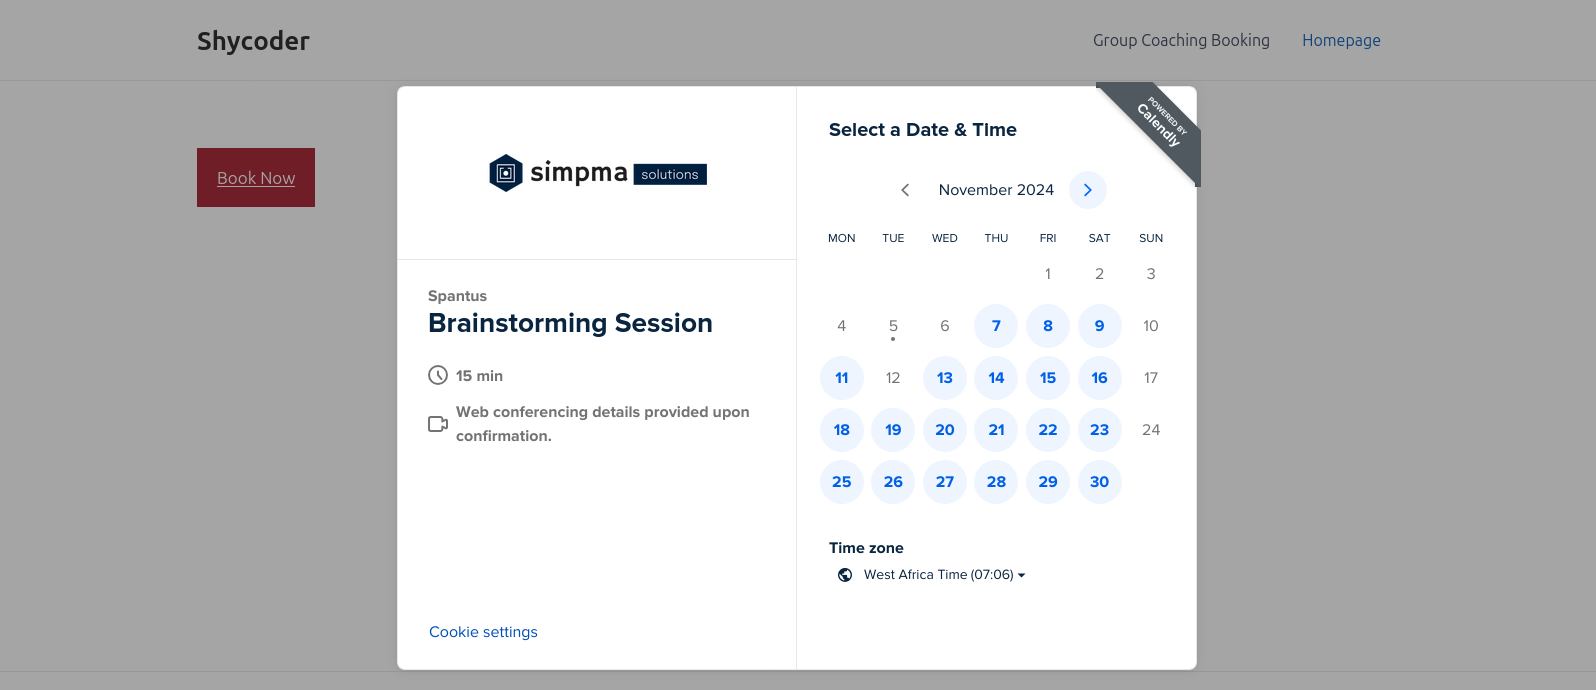
Whether you want to display your Calendly booking page inline, as a button, or in a popup, EMC Scheduling Manager gives you the flexibility to customize and embed your booking page just how you want it.
It’s simple to use, fast to set up, and saves you time every day. But what really sets EMC apart is its seamless integration into your WordPress dashboard. Manage appointments and bookings without ever needing to leave your site.
Ready to simplify your scheduling workflow? EMC Pro offers even more powerful features to make managing your Calendly appointments easier than ever!
Free Version Features
The free version of EMC Scheduling Manager comes with all the basic features you need to integrate and embed Calendly into your WordPress site. It’s simple, easy, and effective:
- Import Calendly event types directly into WordPress
- Customize embed widgets using shortcode
- Widget Customizer for generating and styling embed widget shortcodes
- Supports inline, text popup, and button popup embed options
- Prefill booking fields for logged-in users (no need to re-enter details!)
The free version is perfect for users who need a basic yet effective Calendly integration.
Pro Version Features (Unlock Powerful Upgrades!)
Ready to take your scheduling to the next level? EMC Pro offers advanced features that save you time, help you optimize your workflow, and give you deeper insights into your scheduling efforts:
- View and cancel your Calendly bookings directly from WordPress — no need to leave your site!
- Advanced analytics dashboard to track the performance of your booking pages — see which events are getting the most traction and make data-driven decisions.
- Automated and manual email reminders to ensure that both you and your clients never miss an appointment.
- Import, view, and export contacts — manage your clients and leads right from your WordPress dashboard.
- Full Elementor support for seamless integration with the Elementor page builder — design beautiful pages that fit perfectly with your booking system.
- Analytics data exporter for easy export of booking data into CSV format.
- Everything from the free version with additional customization options and more robust embed features.
With EMC Pro, you’ll be able to do more than just schedule appointments — you’ll be able to streamline your workflow and optimize how you manage your time and your clients.
🔓 Unlock EMC Pro and get everything you need to simplify scheduling and improve your workflow today!
Shortcode
To add a Calendly scheduling page to your WordPress site, use the following shortcode:
[calendly url="https://calendly.com/example/call" type="1"]
You can also customize it further with additional options to match your needs:
[calendly url="https://calendly.com/example/call" type="2" text="Book Now" text_color="#ffffff" text_size="14" button_style="1" button_size="1" button_color="#2694ea" branding="false" hide_details="false" style_class="custom_form_style"]Customization
Use the widget customizer under Dashboard > EMC > Customizer, or apply the following shortcode options to fine-tune your widget appearance:
type– Embed form type:- 1 for inline embed
- 2 for popup button embed
- 3 for popup text embed
url– Link to your Calendly scheduling pagetext– Button or link text (e.g., “Book Now”)text_color– Button or link text color (hex code)text_size– Button or link text size (e.g., “14”)button_color– Button background color (hex code)button_size– Button size:- 1 (small)
- 2 (medium)
- 3 (large)
button_style– Button style:- 1 for inline
- 2 for float
branding– Show or hide branding (true/false)prefill_fields– Prefill form fields with user info (0/1)hide_cookie_banner– Show or hide cookie banner (0/1)hide_details– Show or hide event details (0/1)style_class– Custom CSS class for your embed widget
Why You’ll Love EMC
- No more juggling tabs! Manage all your Calendly bookings and appointments directly from WordPress — save time and streamline your process.
- Save time and reduce hassle with automatic email reminders, contact management, and powerful analytics — handle it all in one place!
- Better insights and data with advanced analytics that help you track your booking page performance and conversion rates.
- Seamless integration with Elementor, making it easy to build beautiful, functional pages that match your branding.
Try the Free Version today and get started with an easy-to-embed Calendly integration. Ready for more? Upgrade to Pro and unlock more features, more flexibility, and more time saved. You’ll wonder how you ever managed without it!
Disclaimer
This is an unofficial plugin for integrating/embedding Calendly features into WordPress.
The free version comes with optional promotion notices that can be easily disabled by clicking the “Don’t show again” button, near the notice.
These notices are shown in your admin dashboard, and once any of them is disabled, all other promotion notices from EMC Scheduling Manager are disabled.
You can upgrade to the pro version to automatically disable all promotion notices.
Optionally, you can disable the promotions by also including the below code snippet in your theme’s function.php file:
add_filter('emcs_promotions', 'emcs_show_promotions');

function emcs_show_promotions() {
    return false;
}